|
Mike's Project(s)
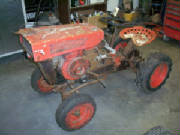
1/10/13 - On to my next project.. the restoration of a 1962 David Bradley Lawn Tractor! David Bradley
made these tractors in the late 50's early 60's to sell as one of the first home owner lawn tractor's by Sears. Saw
this on Craigslist and thought it was cool.. so it's now in my garage.. in a few hundred pieces!
Watch for more pictures as I start assembling it.. 6/1/13 -
All parts stripped clean and ready to paint. Hood, Seat, Wheels painted white.. did when I painted the 2 Golf Cart's... oh,
I didn't mention that Project! See them at the Ecklers and Hudson Shows!! Tks,
Mike
| Mike's Next Project(delayed!) |
|
| 1962 David Bradley Lawn Tractor.. say WHAT?(CLICK PICTURE) |
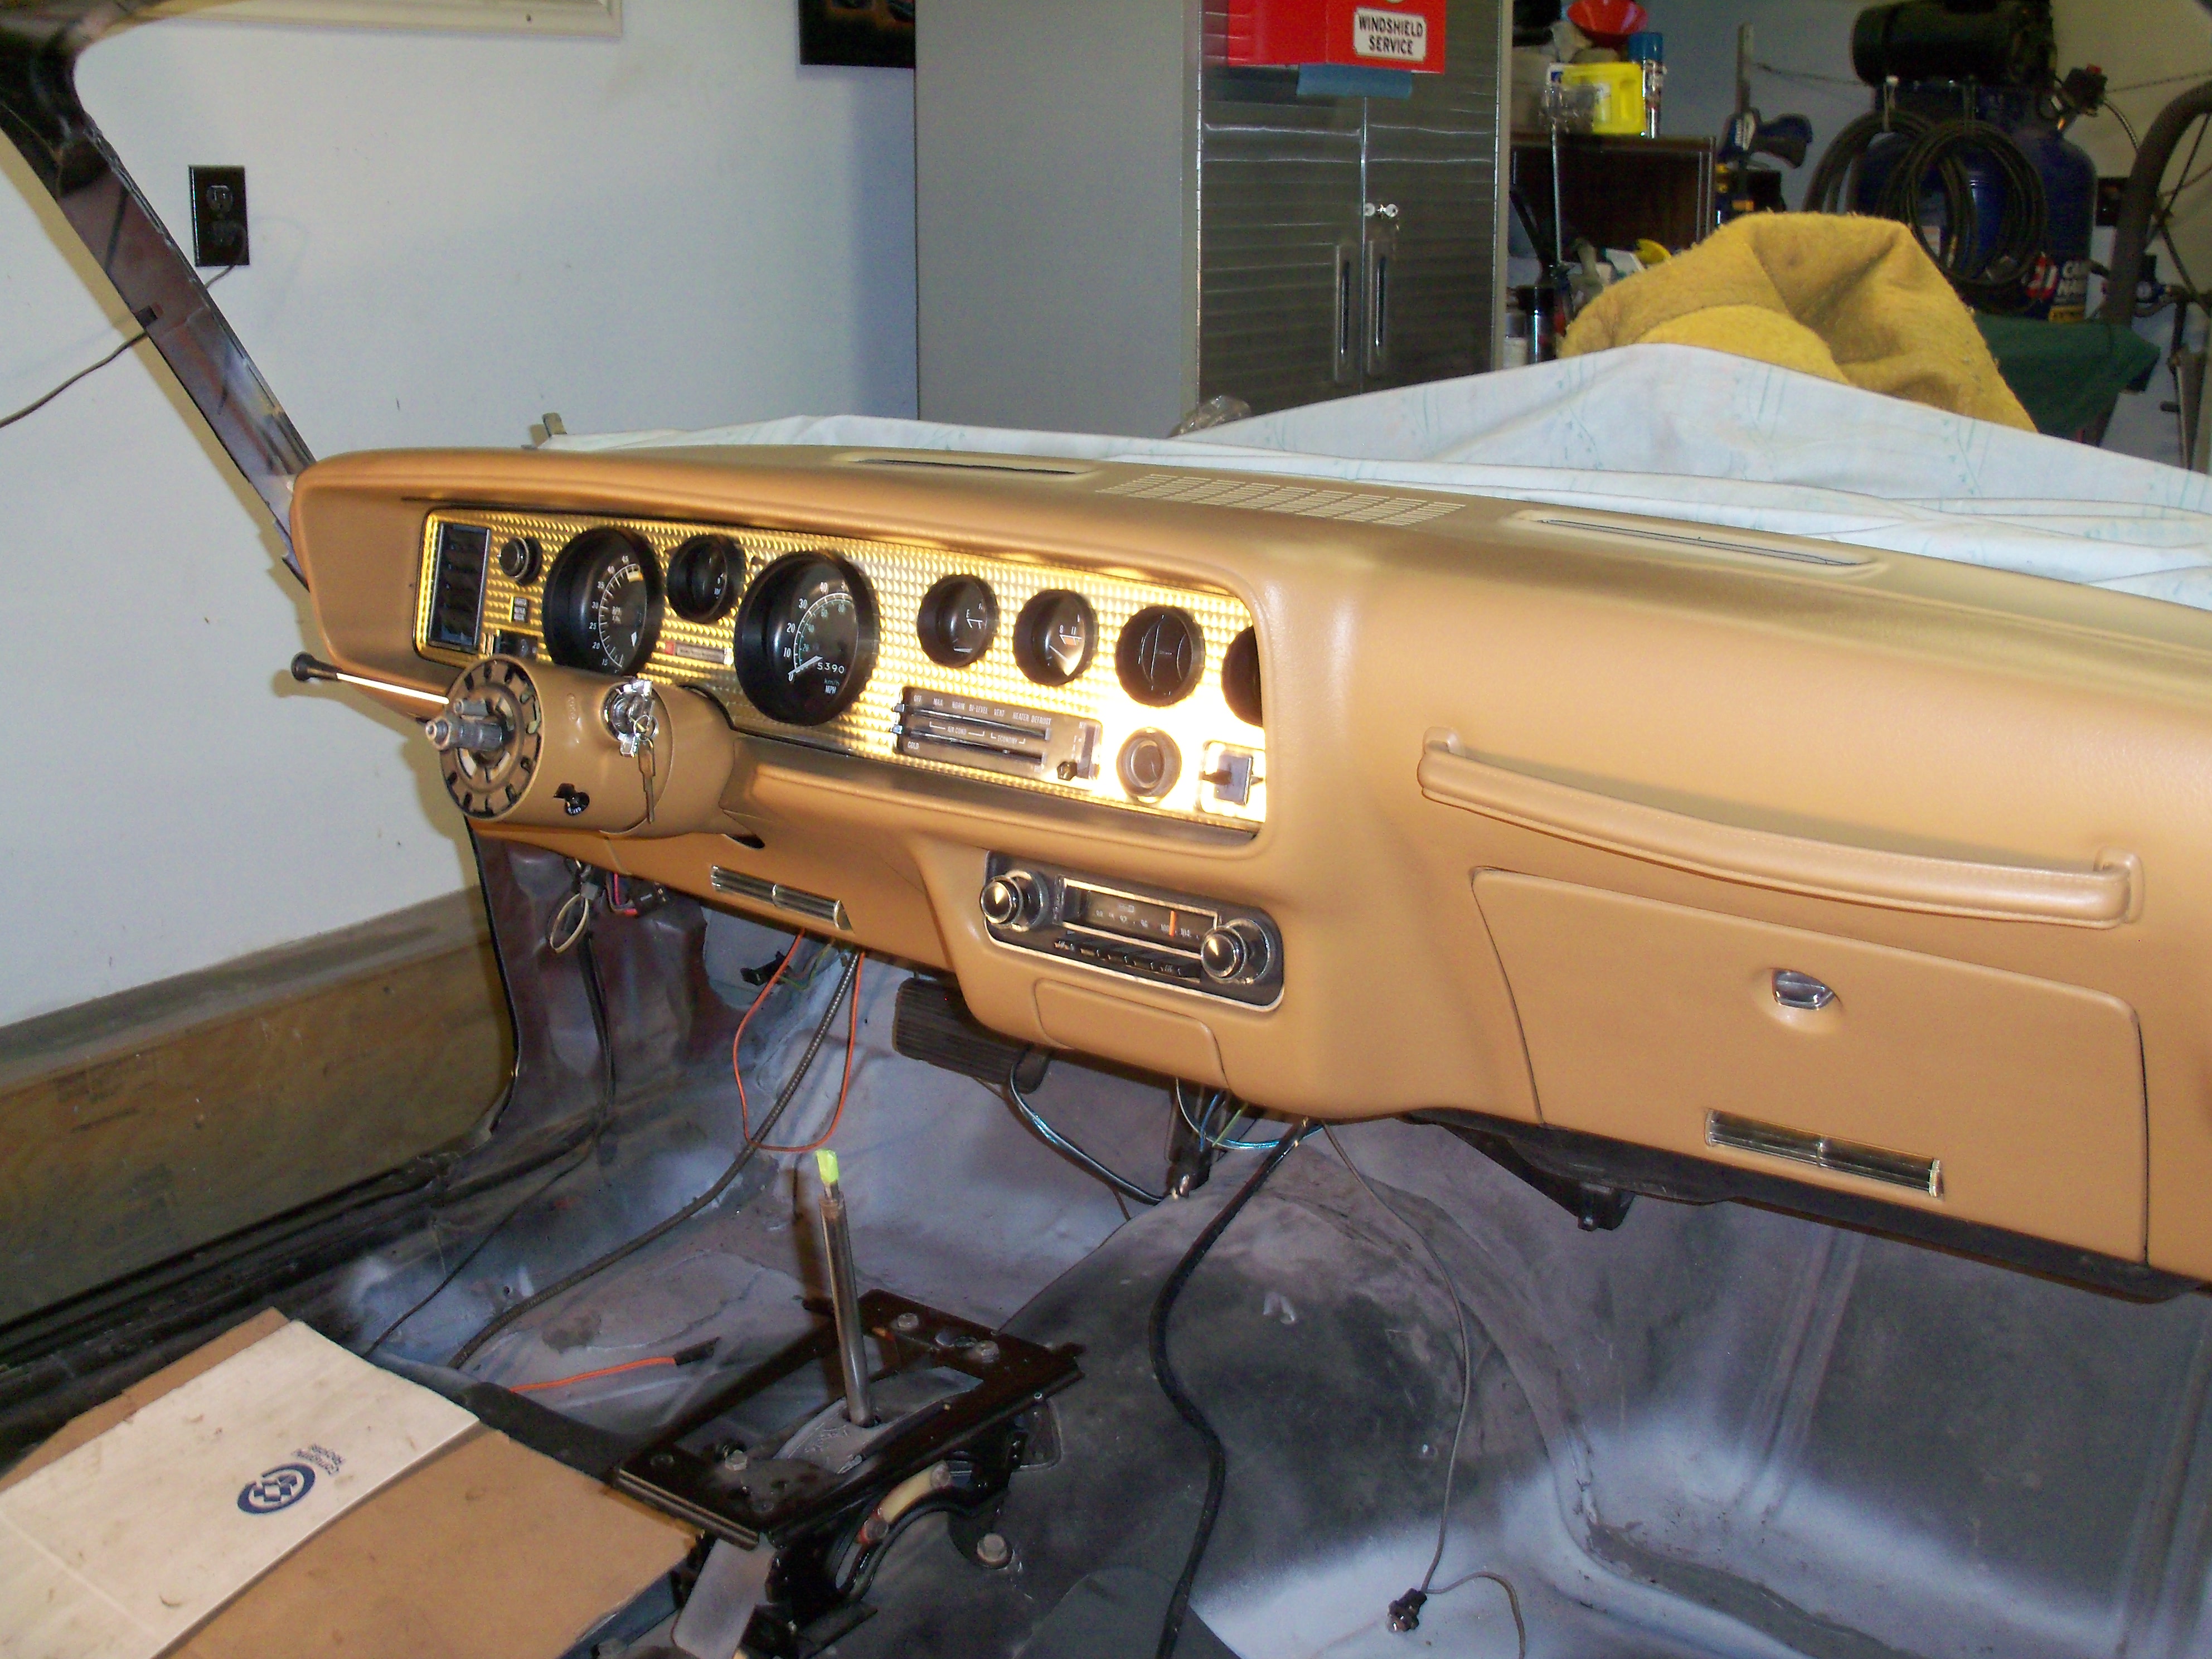
12/31/14: Started working on the Bandit once again.. Took three times of installing, removing, fixing, re-fixing,
my dash.. first time the front edge(which I didn't completely restore).. showed some unfinished edges.. I was going to leave
it as is.. but couldn't live with it. The second time I cracked the top edge just a bit when I installed it(by myself!!)..
didn't really show unless you knew it was there.. again, was going to leave it.. but nah.. pulled the dash out again, took
it all apart and refinished the top edge AGAIN!. Third time.. all is well.. no cracks or breaks.. (had help putting back in
this time).. looks pretty good! Now on to some bodywork!
.
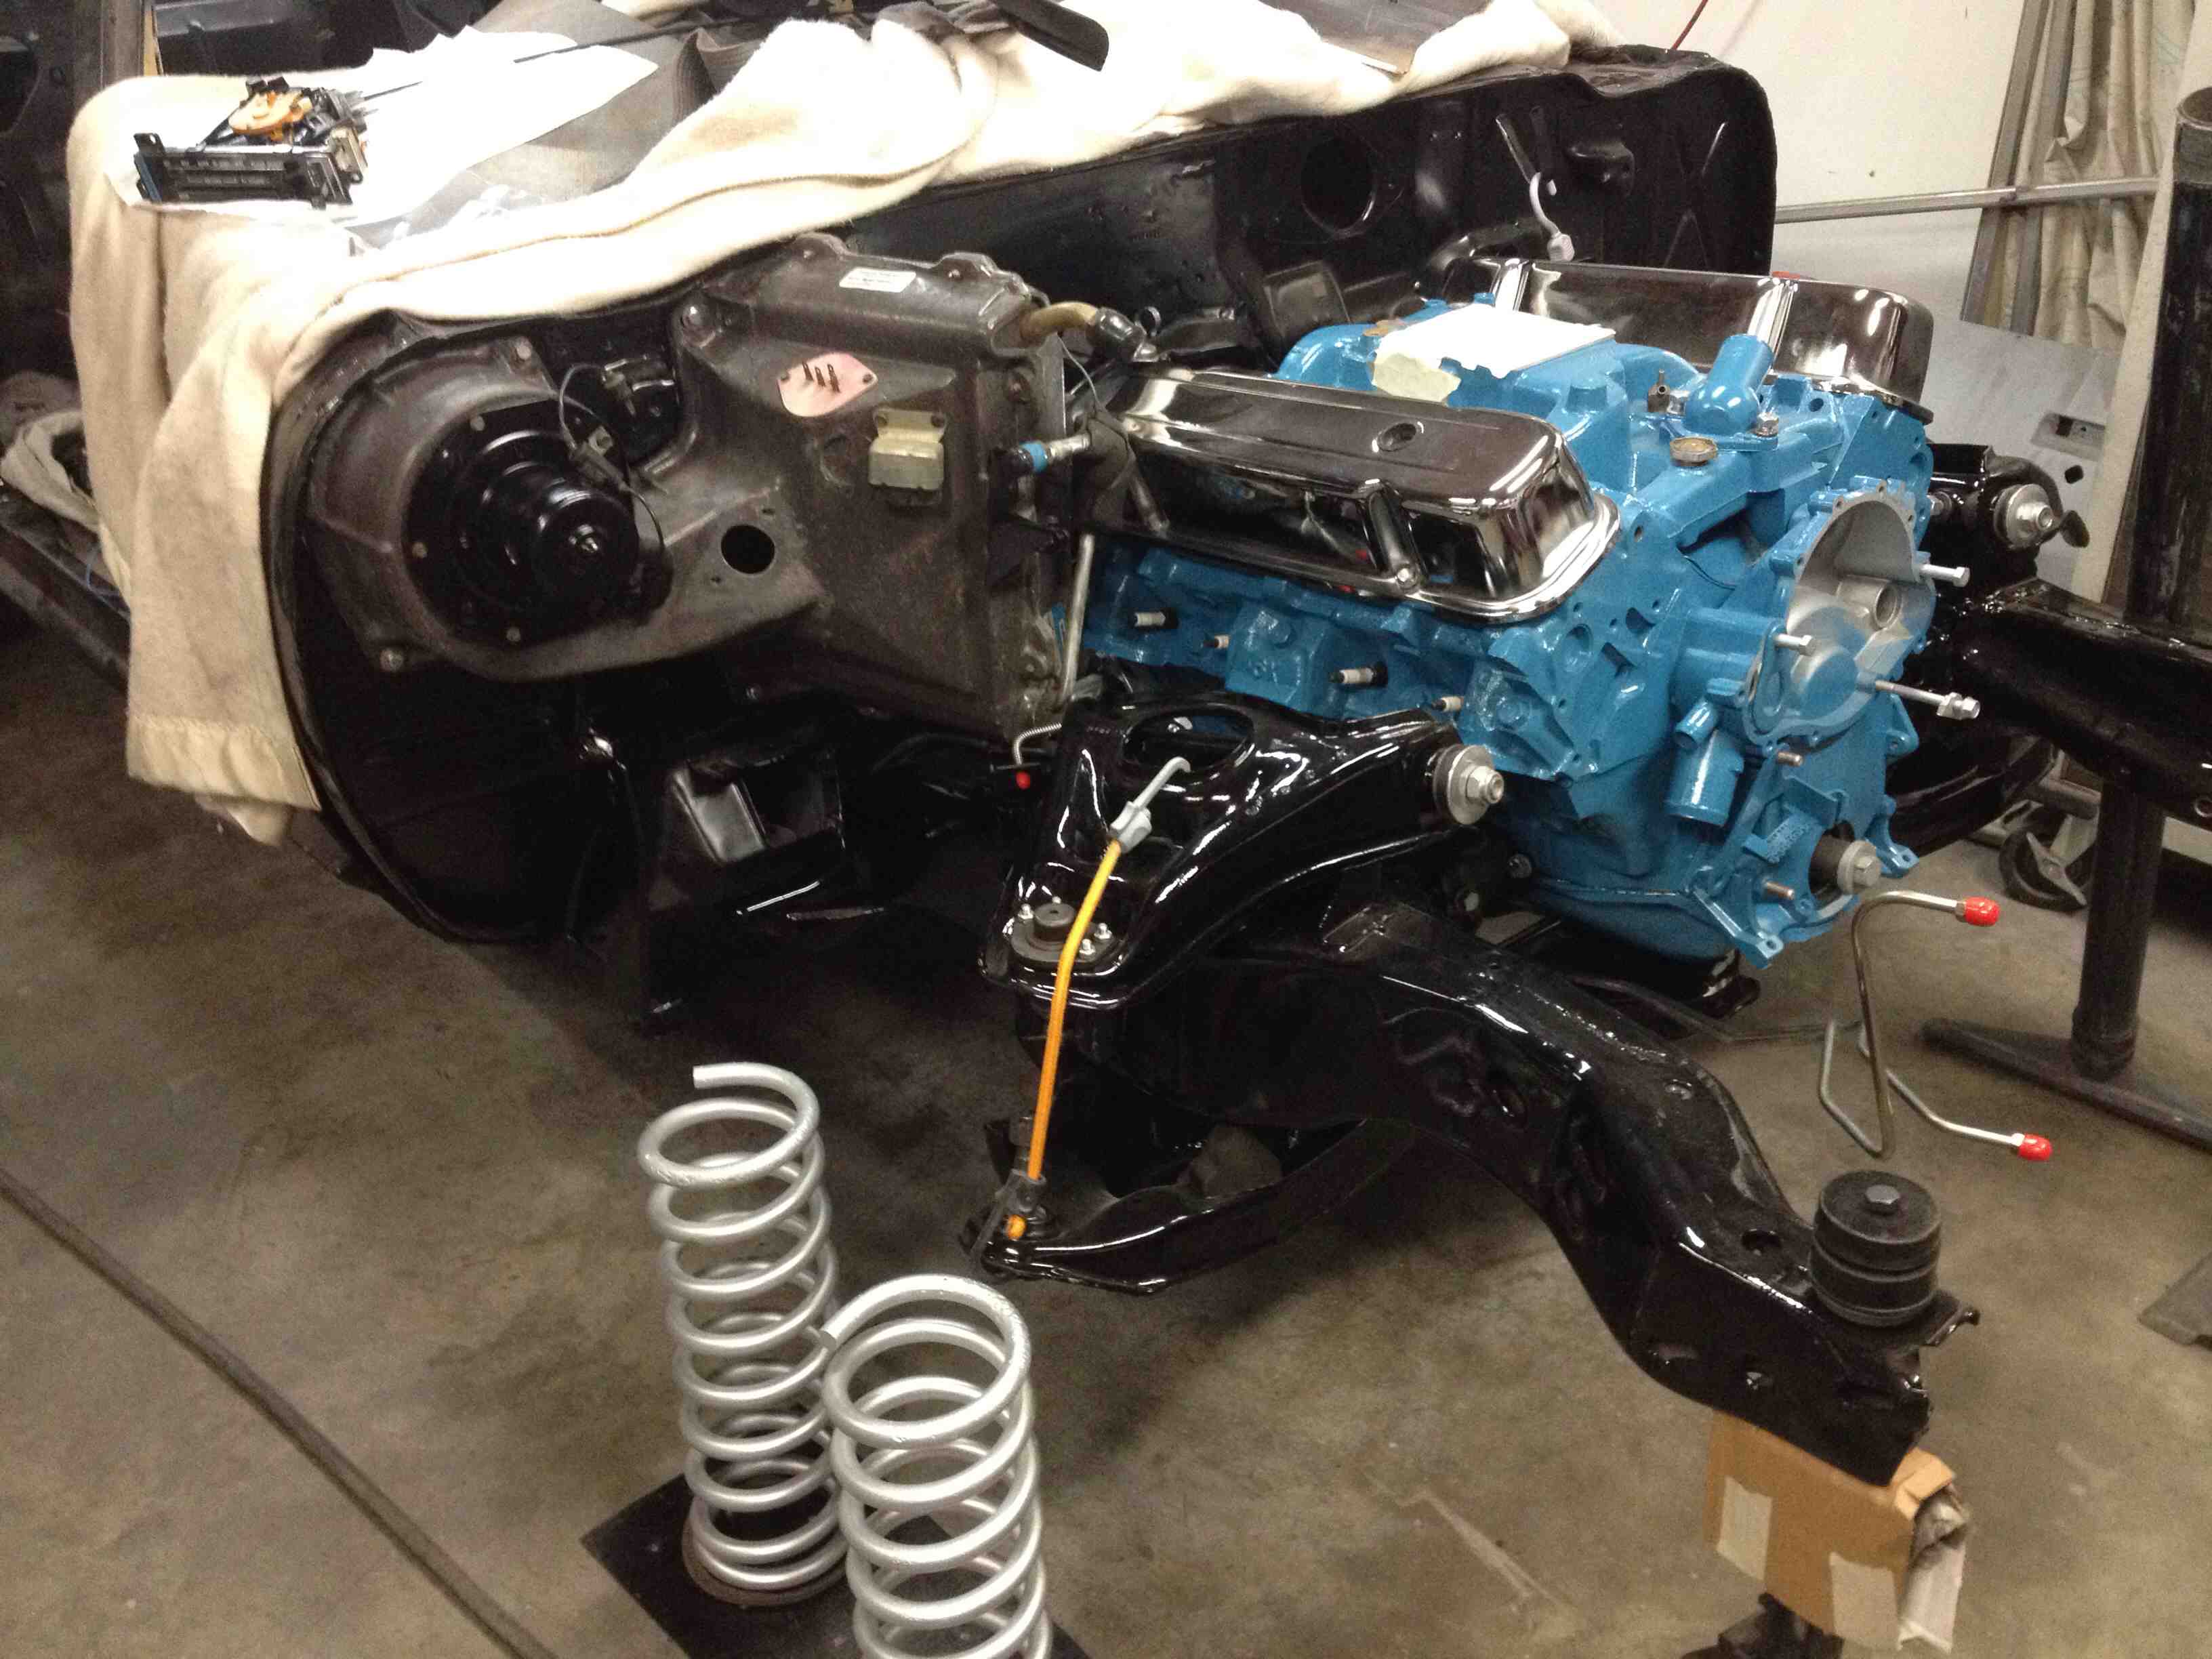
8/14/14: Things starting to come together on the Bandit Project.. I've mounted the engine and transmission
into the subframe and married that to the body. I've run the transmission lines, installed bushings and ball joints to the
Upper and lower A-Arms and got those mounted on the Subframe. I also restored the A/C Unit on the car.. The Evaporator looked
ok to me.. hopefully there are no leaks. I've also restored the Heater assembly that goes inside under the dash.. I was given
a new heater core when I got the car but had to buy another as that one was dented and one pipe snapped off when I opened
the box!. Next is getting the front springs in.. and start putting together the under dash stuff.. Jute Padding, Defroster
Plumbing, Heater Unit, Wiring, etc.. I can also get going on more of the firewall stuff too.. and time to finish up
getting the engine ready.. the Bottom end was done, all rebuilt.. but still have to install the Cam, Lifters, Pushrods, Roller
Rockers, etc.. then I can get the Radiator support(finished cleaning, repairing & Painting the Radiator and A/C Condenser..
both looked ok, didn't appear to show any signs of leaking), then test fit the doors and front fenders. Once those are fitted..
I'll Jam them, re-install and finish with the outside bodywork.. fenders have quite a few dings in them I need to pull out.
Then will be ready for paint! I still need an exhaust system.. Think i'll get a set of Ram Air III Manifolds..
and then i'll need a front to rear 2.5" Exhaust setup. But that's down the road a bit. Still have all the interior work to
do.. but have everything I need (I think) to get that buttoned up. Oh, still need all new glass too.. although I think I may
have a set of door glass up in the attic somewhere.. My goal is to get it to paint by/before the spring..
then i'll need all the graphics installed, finish assembly, etc.. so hopefully sometime next Summer maybe.. (pending other
'projects' that might come along!). I've also been helping my Brother on one of his projects.. Restoration of a 65 or 67?
Honda CL77 305 Scrambler. Nice bike!
5/7/14 - Made a lot of progress on the Bandit since
first of the year.. although it doesn't look it... I've picked up 3 more snowflake wheels, picked the best 4 and cleaned them
up, buffed out best I could and painted gold. Tires next. Also restored/repainted the leaf springs and rear end. New posi,
3:08 gears, bearings, seals, etc. That's ready to go. Also made a trip to Spring Carlisle with a friend of mine.. picked up
a bunch of parts i'll need.. also got a load of stuff from Ames Performance in Spofford NH, just outside of Keene... they
are a huge distributor of Pontiac parts. Everything I wanted was there in stock. Saved me bundle in shipping!.
So I have most of what I need.. still missing some interior pieces, wheel flairs and front spoiler.. As soon as the weather
gets a bit warmer i'll spray the underbody with the red oxide paint like factory.. paint the subframe and i'll be ready to
start assembly. My goal is to get the rear springs, rear end, gas tank, fuel/brake lines, etc.. in place along with the
front subframe and suspension, engine/trans mounted then I can focus on the body work. Still a long way to go.. i'll soon
start adding some pictures as things start coming together.
1/6/14 Update: No recent body work. I
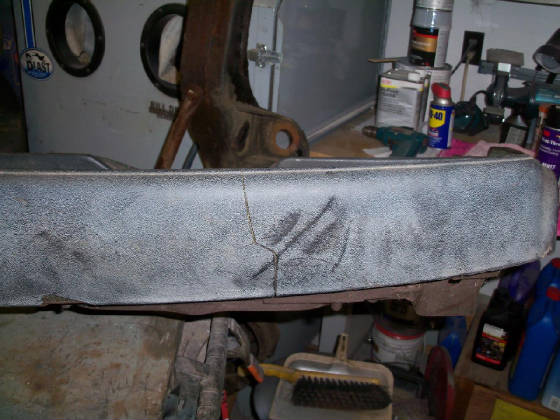
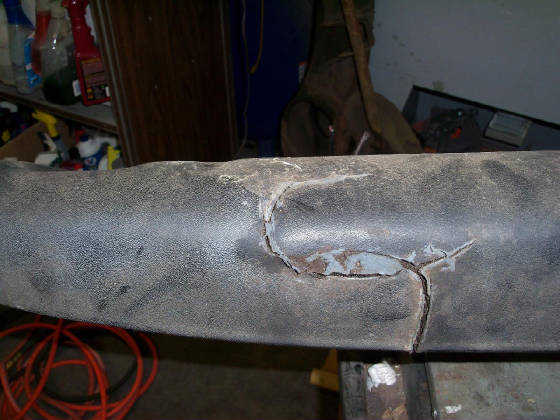
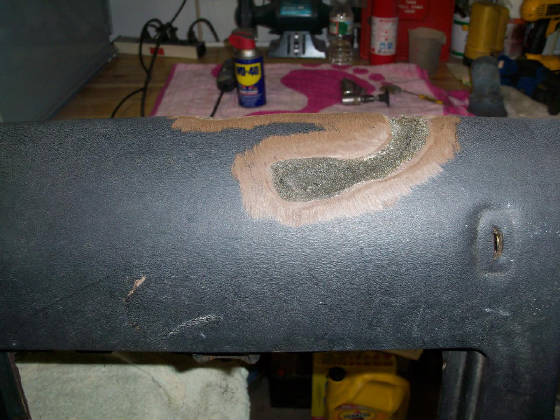
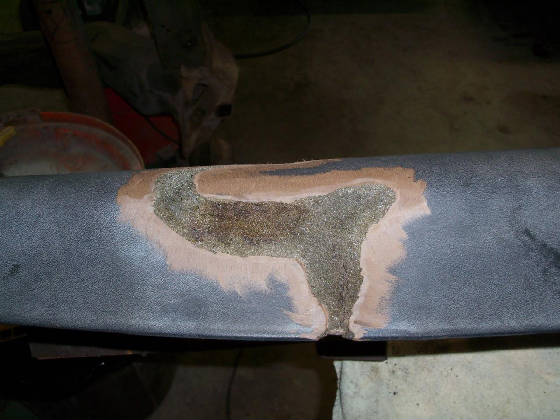
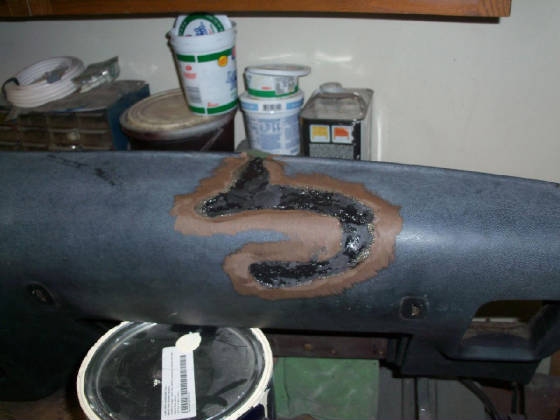
did finish up on the dash. Came out great I think... I followed a process I found online.. 1st. step was to clean and grind
out the cracks and there were lots of them. Had to grind down very deep using a Dremel.. until the crack was gone as well
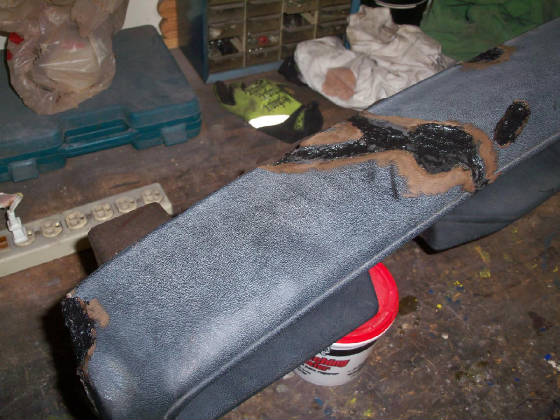
as most of the Foam underneath. Then I used a Filler Prep to clean the crack out and filled the cracks with a special Plastic
Welding filler strips called Fiberflex. These filler strips melt easily, flow
nicely and bonds well with the dash and foam. The 2nd. set of pic's show the black filler done. I filled the cracks to about
1/16 inch from the surface. Then the dash is cleaned with SEM Plastic/Leather Prep product then filled in the rest of the
cracks with Padded Dash Filler from USC(Urethane Supply Company). This is a ‘bondo-like’ filler/hardener product
that dries hard yet stays flexible. It’s used to repair Rubber Type bumpers, etc. Sanding and another layer of filler..
then sand with lighter and lighter sandpaper grits until properly feathered in. Most dash’s have a texture to them..
the article suggested using SEM Rubberized Undercoating(Black #39523). After
another cleaning w/the SEM Plastic/Leather Prep, I sprayed the entire dash down with the undercoating being careful to not
apply too heavy(tested out on some Cardboard first).. Undercoat texture looked pretty close to original texture. Next I used
a can of SEM High Build Surface Primer.. couple of light coats, and went over it ever so lightly with some 400 Grit sandpaper
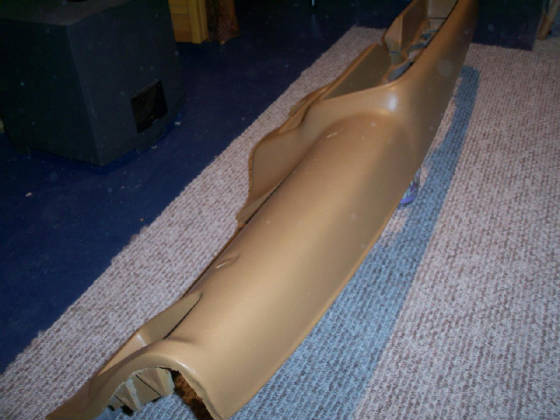
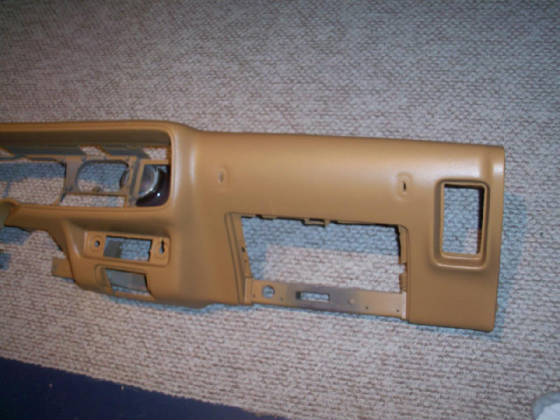
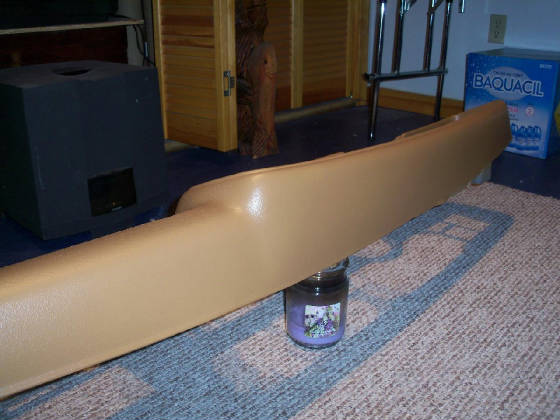
just to knock off any high points. Then after another wipe down, finished with a couple coats of SEM Saddle Tan Coating. Yes, this was a lot of work.. never tried this type of repair before.. but saved
me a ton on a new replacement Dashboard(they are huge on Firebirds!).. plus I get the satisfaction that I did it myself!
12/4/13 - Update:
Started some work.. got it all taken apart, Subframe off, doors, all wiring, etc. Started working
on fenders, primed and basic bodywork started. Started shopping for some missing parts.. still more to go. Will be working
on the body mostly over the winter.. cleaning, priming and maybe paint by the Spring. Did some fiberglass work to the front
grille interior part.. where lights mount, etc.. was broken in two places. Trying to restore the Dashboard/pad next.. very
dry, lots of cracks and breaks. My first time trying to restore a dash.. will see how it goes. Will add some B4 and After
pic's soon. Snowflake wheels cleaned and in great shape.. need 2 replacements.. I have 2 -77's and 2 -78's.. they are different.
Subframe in great shape.. needs lots of cleaning, blasting then paint.. shd be ready by Spring. Putting on all new bushings, ball
joints, etc.. Plenty to keep me busy over the winter that's for sure! 6/1/13 - New Project - 77 Firebird Trans-Am "Bandit" Special Edition. Body in good solid shape, need a little
work on front fenders. Newly rebuilt Numbers matching Original 400 short block. All new interior. PS, PB, Auto, PW, PL, A/C,
Hurst T-Tops. Have most parts for this.. most can be saved.
|

